
Rafters can look dramatic, but they also hide a lot of potential light. The right LED strips can make the whole room feel warmer, brighter, and more finished.
When the ceiling lines glow just right, your space starts to feel bigger and more inviting. Even small changes can make a noticeable difference.
1. Warm White Casing-Backed Strip For a Cozy Glow
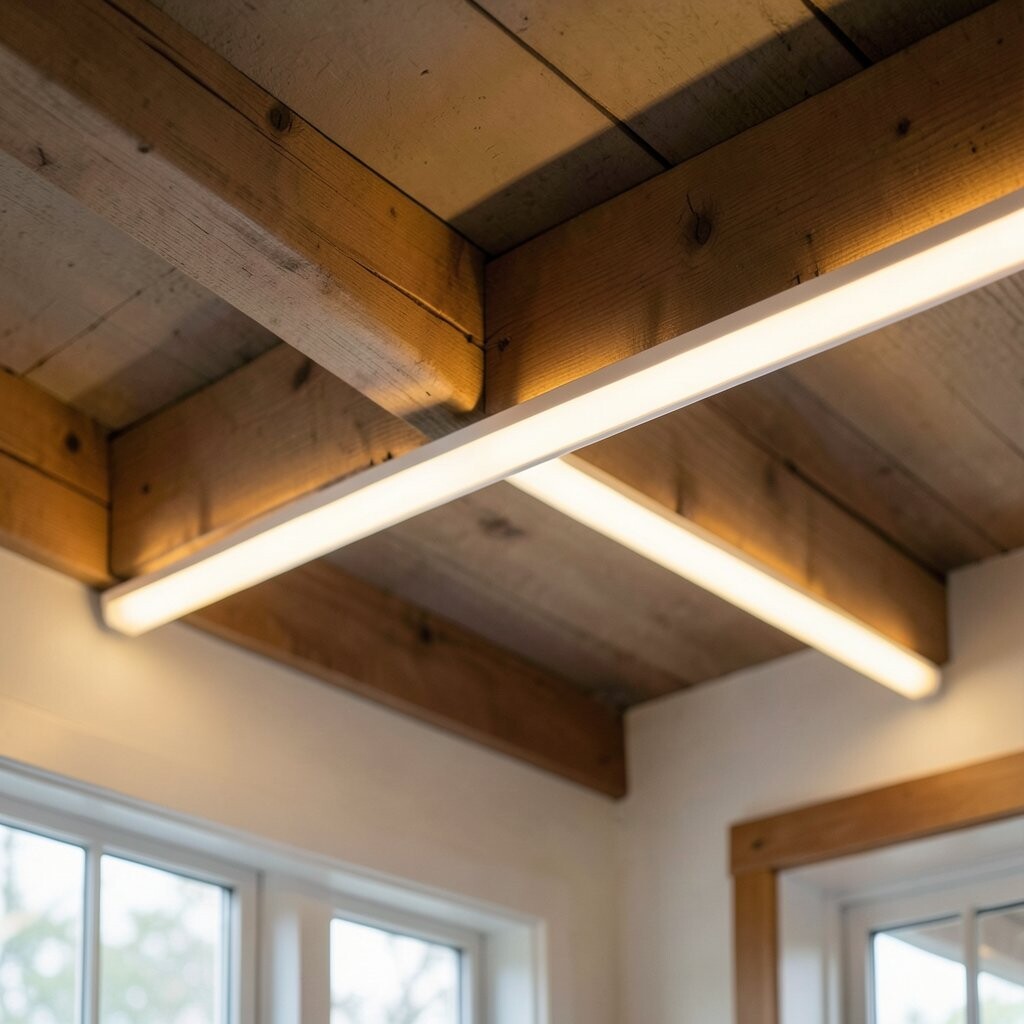
Start with a warm white strip if you want your rafters to look soft and comforting. Imagine the light washing along the wood grain, turning shadows into gentle shapes rather than harsh dark lines.
A casing-backed style helps the light feel smoother because it reduces glare and keeps brightness controlled. You’ll usually get a cleaner look without obvious hot spots. For rafters, that matters because uneven boards can otherwise show the strip’s edge.
Choose a strip color temperature around warm white and pair it with a diffuser or milky cover if you see any points of glare. Install it so the light aims toward the living space, not toward your eyes, which keeps comfort high. If you like to personalize, match the glow tone to your room’s vibe using dimming so movie nights feel extra relaxed.
2. Edge-Diffused Strips For Even Light Between Rafters

If your rafters create angles, edge-diffused lighting makes the ceiling look evenly lit. You’ll notice how the glow spreads naturally, like light fog hugging the beams instead of bright lines.
This design helps hide the strip itself, which is great when you want a tidy finish. Because the light output looks consistent, your room feels more balanced. It’s also helpful for high-visibility spots like kitchens and entryways.
When mounting, keep spacing steady and run a level guide along the beam line. Use clips or low-profile channels so the strip sits the same height all the way. For cost planning, edge-diffused strips can cost a bit more, but fewer visible imperfections often save you from extra adjustments later.
3. RGBW Smart Strips For Flexible Mood Lighting

If you want your rafters to do more than one job, RGBW strips bring choices. Picture colorful light tracing the roof lines while the room stays cozy and lively.
RGBW adds a dedicated white channel, so you can switch between party colors and a stable neutral glow for everyday tasks. Many smart options also let you schedule scenes, dim slowly, or sync to music. That kind of control makes it easier to personalize without constantly moving fixtures.
Pick a controller that supports strong Wi‑Fi performance in your home and check that it works with your preferred app or hub. Plan power access near the start of the run so wiring stays neat. If you’re keeping costs reasonable, start with one main rafter zone and expand later once you see how the look fits your space.
4. High-CRI White Strips For True-To-Life Colors

Sometimes rooms look dull because the light doesn’t show colors the way your eyes expect. High-CRI LED strips can make paint, wood, and decor look more natural under the rafter glow.
When you view a wall color or furniture finish at the same time, you get fewer “washed out” surprises. The beams will still look dramatic, but everything else looks more accurate too. This is a great choice if you have colorful art, patterned curtains, or wood tones you want to highlight.
5. Waterproof Outdoor-Grade Strips For Moisture-Prone Ceilings

Some homes have rafters near vents, humid areas, or changing seasons that affect moisture levels. Waterproof strips handle that pressure better and keep the glow reliable, season after season.
You’ll see a steady line of light that stays bright even when conditions aren’t perfect. Weather-resistant design also means fewer worries if your ceiling gets occasional condensation. That comfort is worth it, especially in basements, cabins, and homes with tall vaulted roofs.
Choose the correct ingress protection rating for your setup and seal connections carefully. Use cable glands or proper connectors so water can’t creep into joints. For personalization, match the waterproof strip tone to your décor, like warm white for cabins or neutral white for modern kitchens.
6. 24V Low-Voltage Strips For Longer Runs

If your rafters stretch far across the room, voltage matters more than people think. A 24V strip can run longer distances with less drop-off in brightness, so the far end doesn’t fade.
Visually, you get a consistent glow that stays even across multiple beams. That makes the ceiling look intentional instead of patchy. You can also plan longer sections without constantly adding power supplies, which helps keep the install cleaner.
Measure your total length and plan where you’ll mount power points before you start. Installing at the correct interval helps maintain the same brightness and color across the entire run. If cost is a concern, you may pay a bit more upfront for 24V systems, but you can avoid extra drivers and connectors from frequent breaks.
7. Slim Aluminum Channel Systems For A “Hidden” Look

You can make rafter lighting feel like it’s floating by hiding the strip inside a slim aluminum channel. When the channel is tucked along the beam, the light spills out smoothly instead of showing the LED line.
This setup gives you protection too, since channels help shield the strip from dust and bumps during future home projects. It also looks neat, which matters when guests stare up at vaulted ceilings. If you want uniqueness, choose a channel design with a wider lens to soften the beam glow.
Install the channel first, then attach the strip and test before sealing anything in. Use end caps so you get a complete, finished edge along the rafters. For cost, channels can add expense, but they often reduce troubleshooting and replace headaches later with a cleaner result.
8. Wide-Angle Diffuser Strips For Spotlight-Like Beam Control

Some rooms benefit from a brighter, more focused wash rather than a gentle haze. Wide-angle diffuser strips can give you that controlled glow, helping you highlight certain ceiling lines or areas.
When the diffuser spreads light without turning it harsh, the rafter shadows look softer while the center feels brighter. That’s ideal for reading corners, craft zones, or kitchens where you need clear visibility. You can also use dimming so the space shifts from task light to relaxing ambiance.
9. Self-Adhesive Backed Strips For Quick DIY Mounting

If you want the job done fast, self-adhesive strips can be a friendly starting point. With the right surface prep, the glow line looks smooth and professional without heavy tools.
Clean your rafters well and let the surface dry so the tape holds strong. Then, press firmly and run slowly so the strip follows the beam line without gaps. For practical personalization, you can use small spacing marks so each run matches the room’s geometry.
Keep in mind that some finishes on wood and drywall can affect stickiness, so test a small section first. If you’re budgeting, adhesive strips are often cheaper than channel systems, which helps if you want to light multiple areas. The tradeoff is that you may need extra securing clips in high-heat spots.
10. Magnetic or Clip-Mounted Strips For Easy Future Changes

Nothing feels more practical than lighting you can adjust later. Clip-mounted or magnetic systems let you swap strips, change colors, or reposition runs with less hassle than permanent adhesive.
You’ll like the clean look because clips guide the strip in a steady line. And when something happens, repairs become simpler since you can remove sections without tearing up everything. This is especially handy for homes that use seasonal decor or frequent renovation projects.
Choose a mounting track that matches your rafter depth and plan where the clips will sit along the beam. Test the light angle before fully locking anything in place. While the materials can cost a bit more, the long-term flexibility often saves time and money later.
11. Dual-Row Strip Setups For Bold Accent Drama

Want your rafters to look like a feature wall, not just a lighting detail? A dual-row strip approach can create a richer glow with extra depth along the roof lines.
When both rows work together, the ceiling takes on a layered look that feels like it belongs in a design magazine. It can also brighten darker corners under overhangs or near stair landings. The extra brightness helps highlight wood textures and ceiling curves, which adds uniqueness to your space.
To keep it tasteful, choose the same color temperature for both rows and aim them so the light spreads evenly. Add dimming so you can dial down intensity during everyday hours. For cost considerations, dual-row setups use more LED, but they can reduce the need for other overhead fixtures.
12. Addressable Pixel or Segment Strips For Custom Patterns

If you like creative lighting that matches your style, addressable pixel or segmented strips give you patterns instead of just a steady line. Imagine tiny sections that can brighten in waves along the rafters, even when you’re not entertaining.
These strips feel unique because you can create your own looks, like slow color shifts, seasonal themes, or a simple white “running” effect for everyday ambiance. Many systems support custom scenes, which makes it easy to personalize for holidays or birthdays. You’ll get a ceiling show that still feels cozy when set to warm, low intensity.
Plan your layout carefully because pixel density affects both cost and how smooth animations look. Map the segments along each rafter line so the visuals don’t look misaligned from the main seating spot. For practical setup, start with a small section to confirm brightness levels, then scale up once you love the effect.