Warm fabric art has a way of making a room feel calmer and more you. Framed embroidery turns simple walls into stories you can see every day.
Whether you love vintage looks or modern color pops, there’s a smart way to hang needlework that fits your space and your life.
1. Tiny Hoops, Big Charm for Shelf and Sill Walls
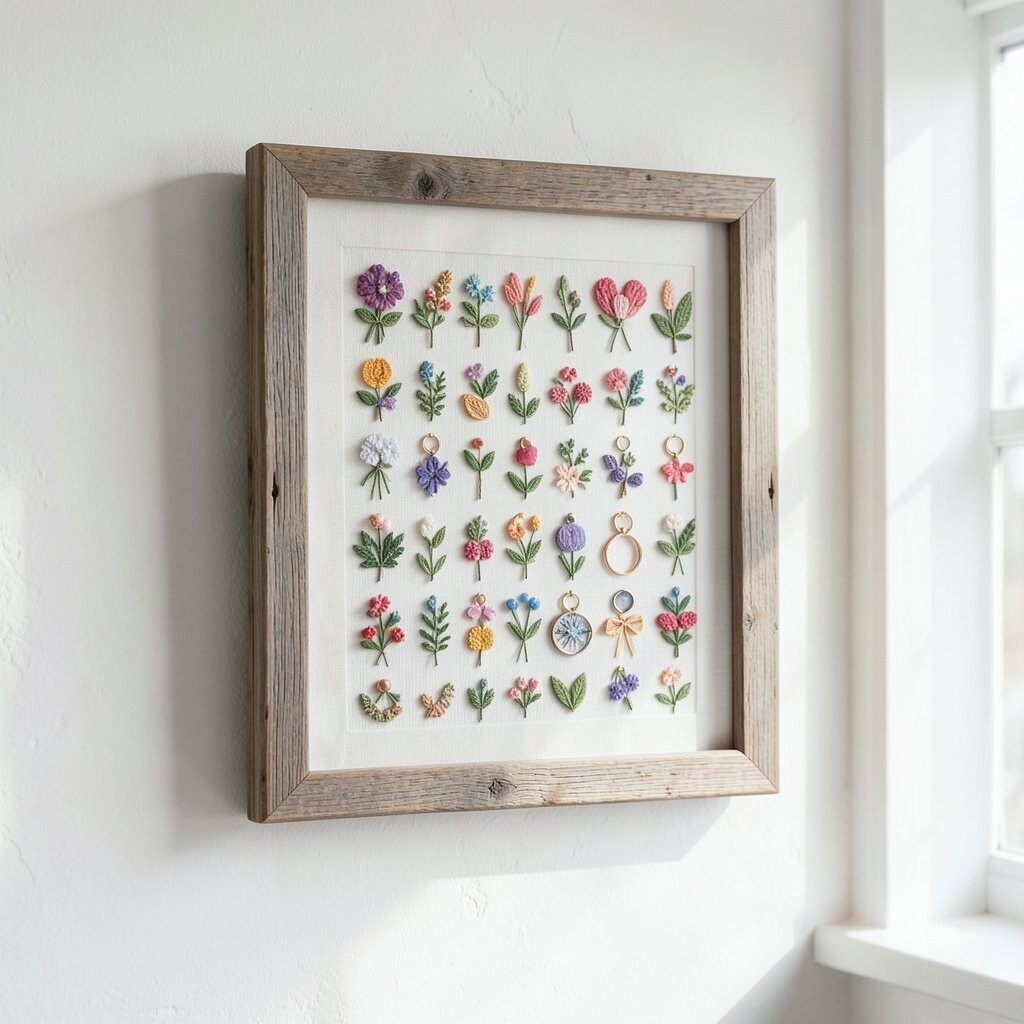
Pick a few small framed embroidery pieces and cluster them along a shelf edge or sunny windowsill area. The gentle textures show up even from across the room, like little bursts of cozy detail.
Choose hoops that share the same background color so the set feels tidy. Keep spacing loose at first, then adjust until the arrangement looks balanced without feeling stiff. For a practical start, group pieces by theme, like flowers, birds, or neat geometric stitches, so you can personalize quickly.
2. A Matching Trio That Looks Curated Without Being Hard

Select three framed embroidery designs that share the same shape and frame finish, like matching black or warm wood. When hung at eye level, they make a wall feel planned and calm.
Use coordinating thread colors so the set blends with your decor, even if the patterns differ. You’ll benefit from a clear focal point that draws the eye and softens the room’s angles.
For cost sense, hunt for smaller frames or use one larger piece as an anchor while the other two fill the gaps. If you’re buying ready-made, focus on quality fabric and neat back stitching so the art stays crisp for years.
3. Color-Blocked Frames for a Modern Needlework Look
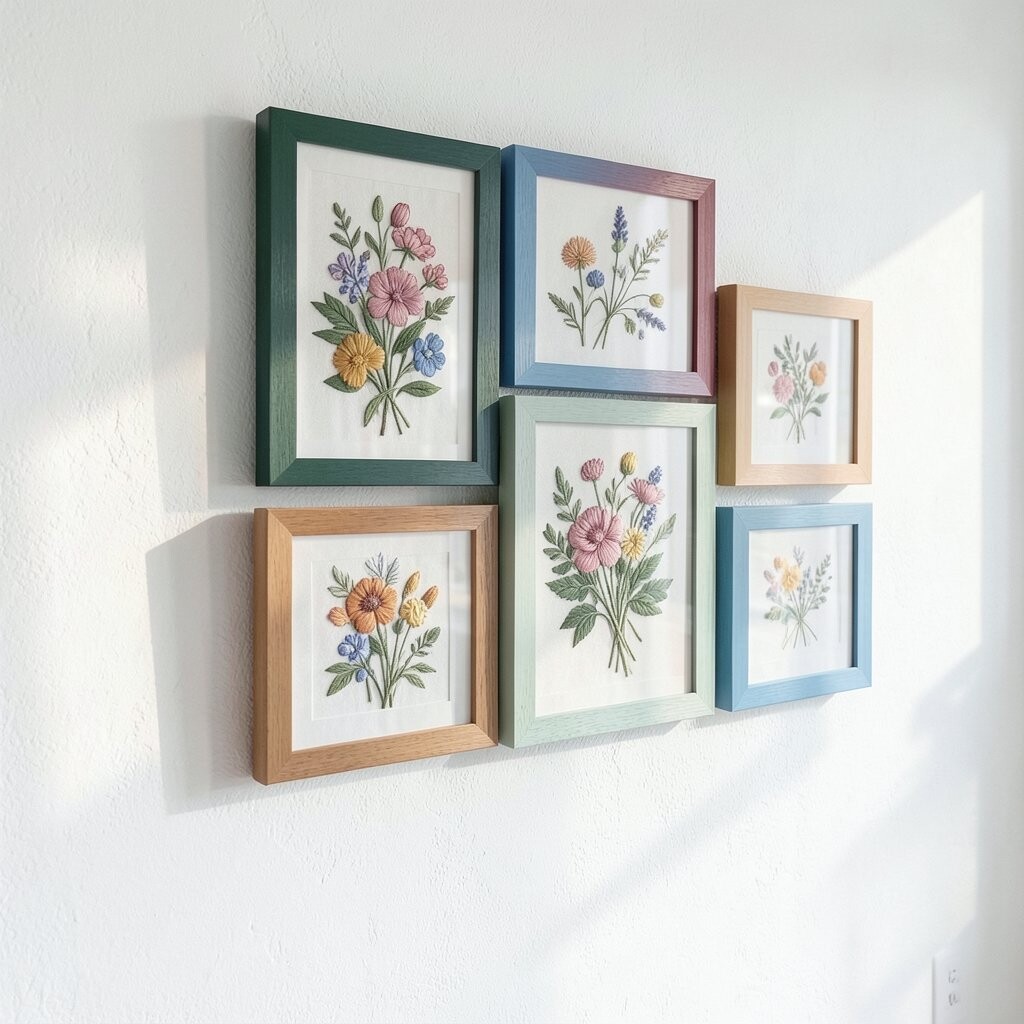
Go bold by pairing embroidery with frames in contrasting colors that match your cushions, rugs, or accent items. The embroidery texture looks extra lively when it sits inside a strong color frame.
Stick to a simple rule: keep the embroidery palette limited so it doesn’t compete with the frame colors. Choose one main shade to repeat in multiple frames for a cleaner, trend-friendly vibe.
To keep it practical, measure your wall area and plan the grid in low-stress increments before you hang anything. If you’re making or customizing, consider adding a tiny border in matching thread tones so every piece feels intentional.
4. Oversized Centerpiece Framing for the Main Wall Focal Point
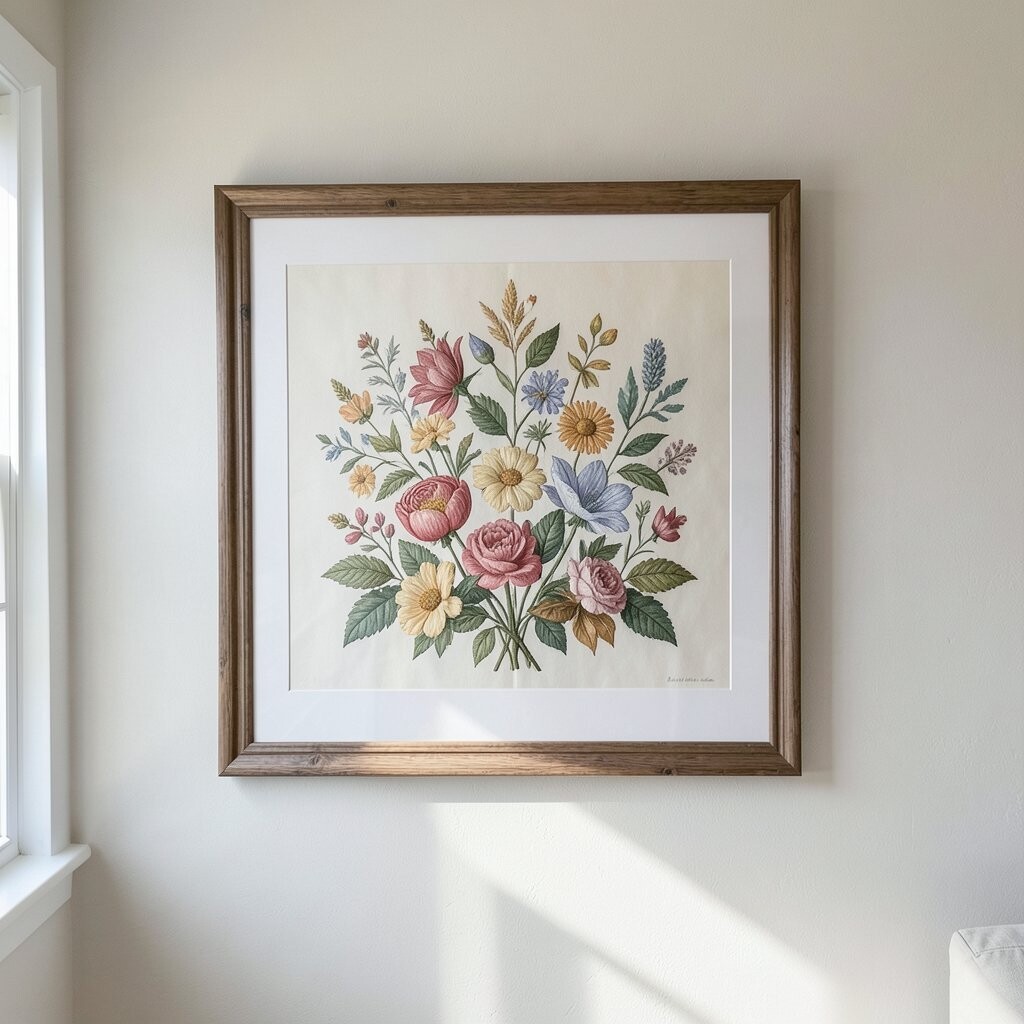
Choose one larger framed embroidery artwork to anchor a living room, bedroom headboard area, or dining wall. The scale gives your wall presence, and the stitched details feel richer when you can see them clearly.
Place it slightly above furniture height, then let the embroidery soften the space with a warm, handcrafted mood. This setup also makes it easier to style around, because you only need to build harmony with accessories rather than match multiple pieces.
5. Gallery Wall Layout With a Soft Fabric Timeline
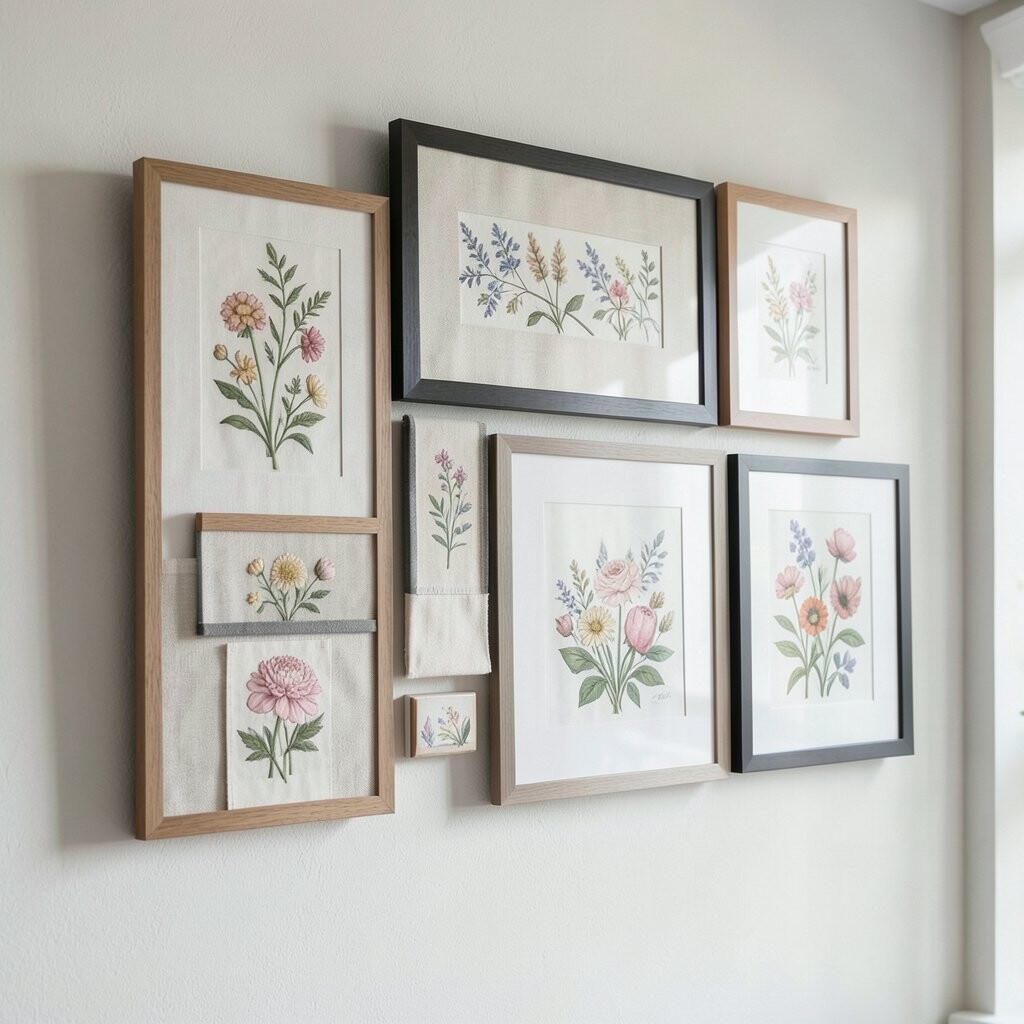
Build a gallery wall using framed embroidery mixed with a few coordinating prints or photos. The embroidered pieces add texture, while the simpler art helps your eye rest between busy stitches.
Try an uneven layout, where one or two pieces are larger and the rest vary in size, because that’s what feels modern right now. You’ll get a unique look that still feels organized, especially if frames share a similar finish.
For practical hanging, lay the arrangement on the floor first and take quick photos from above. Adjust until the center feels aligned, then hang using painter’s tape to mark height before drilling.
6. Leaning Frames on a Console for Instant Style
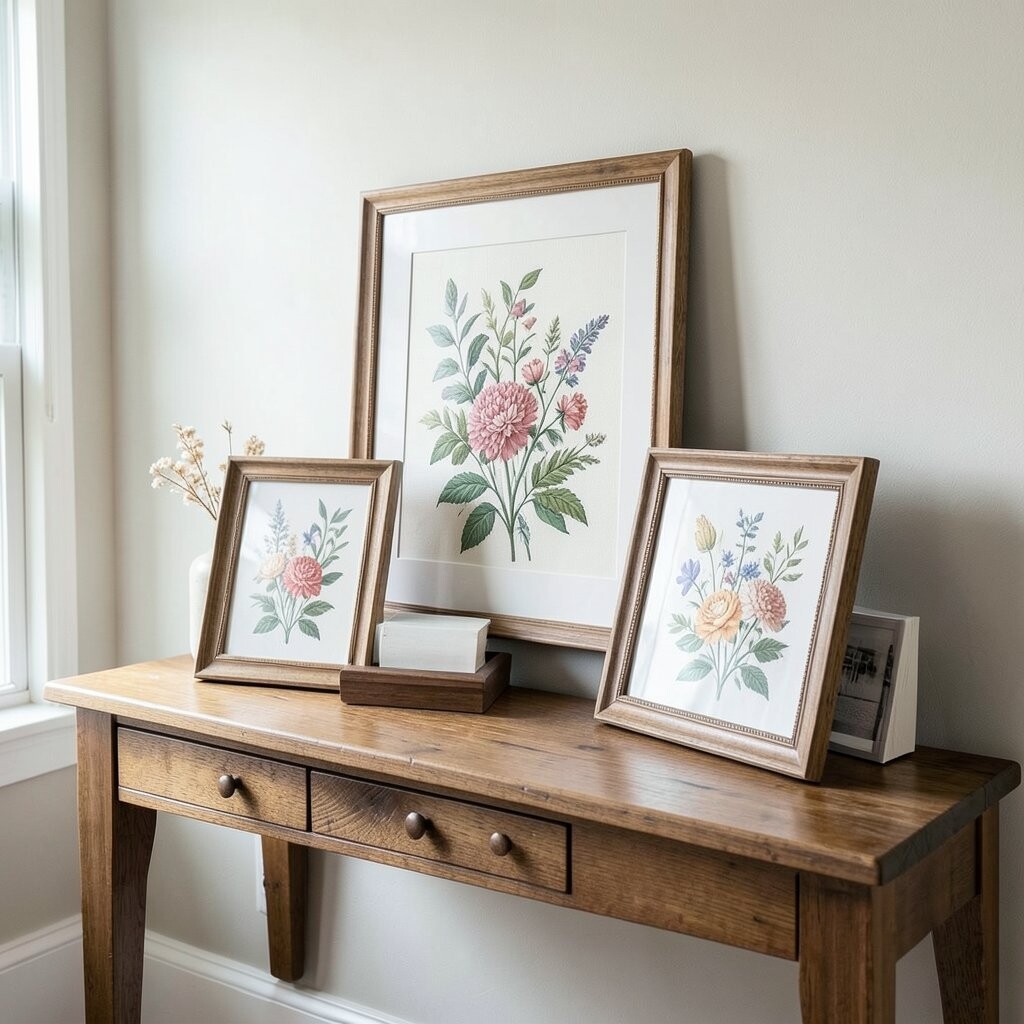
If you like flexible decorating, lean framed embroidery on a console table, dresser, or entry bench instead of mounting everything. You’ll get an easy, breezy vibe that still shows off the stitched details beautifully.
Mix small and medium frames, and keep the colors tied to your room palette. This approach lets you personalize as seasons change by swapping one frame at a time.
For cost and convenience, thrift or upcycle frames you already own, then refit them with embroidery you love. A simple backing and secure hanging wire will help it stay steady and safe.
7. Staircase or Hall Runner Wall With Tiny Stories
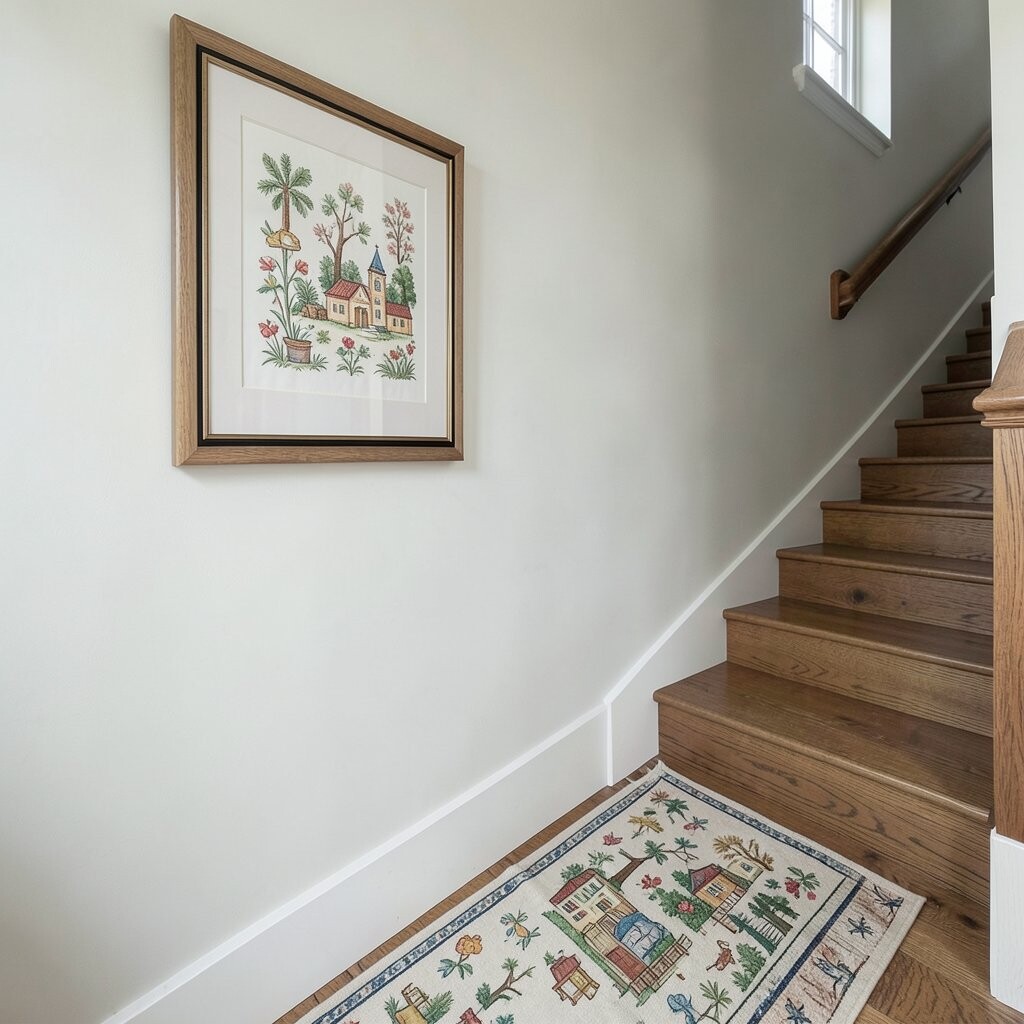
Turn a hallway or staircase wall into a vertical pathway of framed embroidery. The movement of stairs makes the artwork feel like a series, and every step brings a new stitched detail into view.
Use a consistent frame style and keep the embroidery size smaller so the wall doesn’t overwhelm the space. When you hang multiple pieces down the hallway, the hallway feels longer and more welcoming.
Measure the rise and aim for spacing that matches how you naturally walk. If you’re working on a budget, focus on a set of thread-friendly patterns that repeat a color, like soft florals or simple initials, so the collection feels cohesive.
8. Pairing Embroidery With Mirrors for Light and Warmth
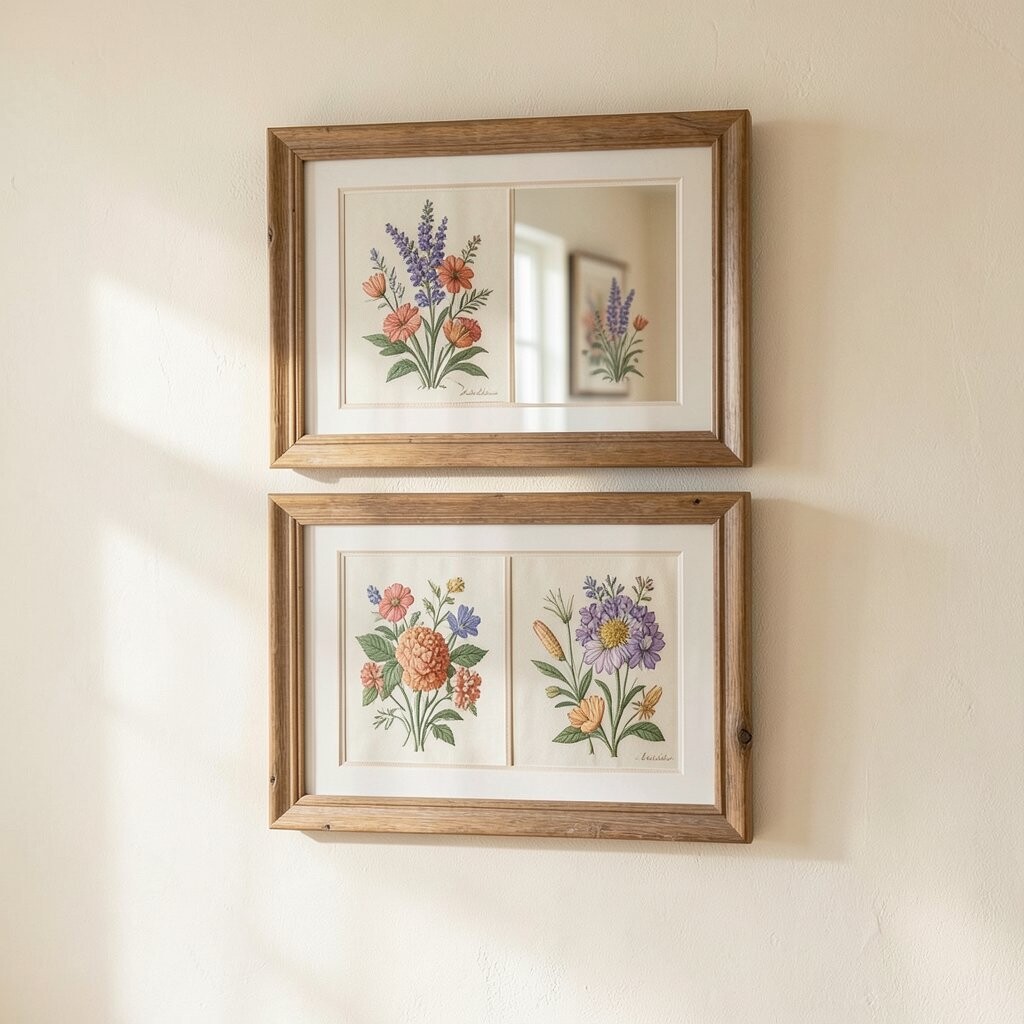
Place a framed embroidery piece near a mirror, or frame embroidery into the area surrounding the mirror. The mirror bounces light around, while the embroidery adds warmth and a handmade softness.
Choose embroidery designs with lighter backgrounds so they reflect light instead of absorbing it. This combo can make small spaces feel brighter without using extra décor.
For personalization, match the embroidery colors to the frame finish of the mirror, like brass tones or matte black. If you’re cost-conscious, you can thrift a mirror frame and use a well-finished embroidery card or hoop to keep the look polished.
9. Cloth-to-Frame Styling With Textured Backing

Give your embroidery frames a richer look by using textured backing like linen, burlap-like fabric, or soft cotton in a matching tone. The extra layer makes the stitched art feel deeper, even when the embroidery itself is simple.
You’ll also get practical durability, because thicker backing can help support delicate threads and keep corners from looking wavy. If you’re making art, consider using a fabric that complements your room’s texture, like a woven accent wall or a cozy rug.
For budget planning, look for fabric remnants at craft stores, and choose a neutral backing that works with many designs. This lets you build a cohesive set over time instead of buying a whole new wall collection at once.
10. Seasonal Swap System With a Clear Center Layout
Create a wall plan where one framed embroidery spot is reserved for seasonal swaps. The room stays bright and current, and the embroidery becomes a gentle tradition rather than a permanent commitment.
Use a consistent frame size and style, then rotate designs that match the season, like spring florals, summer coastal themes, autumn leaves, or winter snow-inspired motifs. This keeps the look coordinated while still letting you personalize freely.
For practical ease, use removable hardware or frames that open easily so swapping is fast. It can cost less than buying brand-new art each time, especially if you collect patterns slowly or stitch your own over weeks.
11. Border-to-Border Layout for a Tidy, Picture-Perfect Feel
When you want a crisp look, hang embroidery frames in a straight line, with each piece aligned to form a border effect. The uniform spacing makes the wall feel neat, like a well-tailored outfit for your home.
Pick frames with the same width so the layout looks clean, and choose embroidery that shares a similar style, such as simple outlines or stitched patterns with consistent line weight. This trend-friendly approach works well in dining rooms, offices, and bedrooms where you want calm order.
To keep it budget-smart, choose a few larger pieces rather than many tiny ones, because fewer frames mean fewer costs. If you’re going DIY, use printed sizing guides so your embroidery sits centered inside the mat or backing.
12. Frame Within a Frame for Extra Depth and Detail
Create a layered look by placing embroidery inside a mat, then enclosing it again in a frame that has its own texture or molding. The extra depth makes the stitchwork pop and adds a premium feel.
You’ll benefit from better contrast, since a light mat can separate embroidery thread from the backing. This is also a great way to personalize, because you can choose mat colors that match your wall paint, like warm cream for beige walls or cool gray for modern spaces.
For cost considerations, you can buy one set of quality frames and reuse them as you rotate embroidery. If you shop smart, look for frame sales and choose sizes that fit multiple hoop or card styles so you’re not locked into one purchase.
13. Mixing Embroidery Styles With One Shared Theme Color
Combine different embroidery themes, like botanicals, abstract stitched shapes, and simple typography, as long as they share one consistent theme color. This unifying thread makes the set feel intentional even when the designs vary.
Choose that color by looking at what you already use often, such as your throw pillows, curtains, or a favorite rug accent. The benefit is a cohesive wall that still feels playful and personal.
To keep it practical, start with a small collection of two to four pieces, then expand only when you find additions that match the theme color. This approach helps you spend wisely, because each new frame must earn its place in the story you’re building.