Small changes can make a room feel brand new. Tile mosaics help you add color, pattern, and personality without needing a full renovation.
1. Sunburst Marble Bits for Instant Glow
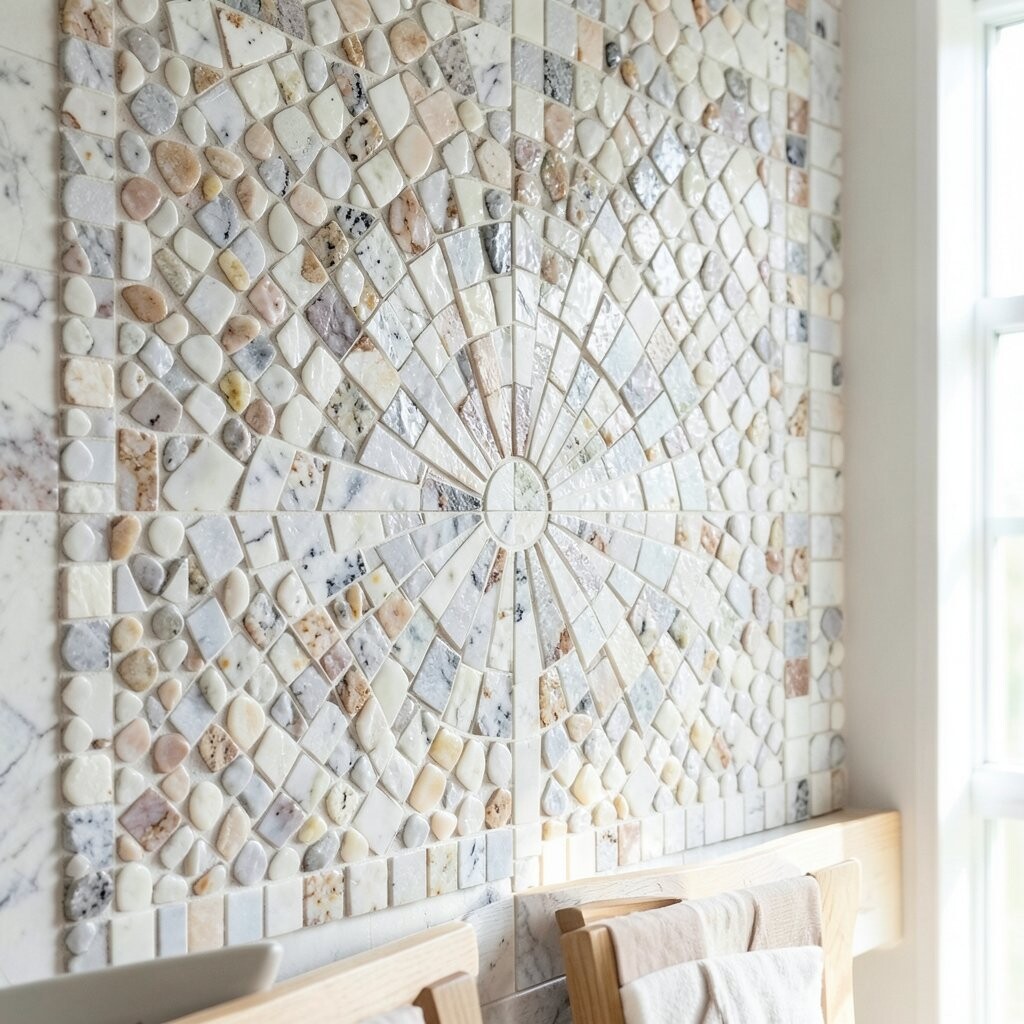
Imagine your wall catching light like a tiny spotlight. A sunburst pattern made from marble chips or glossy offcuts creates a soft shimmer that feels warm and cheerful.
Start by sketching a simple circle and “rays” with pencil on the wall or a backing board. Lay the tiles outward from the center, spacing them evenly so the pattern looks clean. Use a grout that matches the tiles or choose a bright contrast for extra pop.
For a modern touch, mix a few warm neutrals like ivory, sand, and light gray. To keep it DIY-friendly, press the pieces into adhesive in small sections so they don’t dry out. If you want it to feel even brighter, seal natural stone tiles after grouting to deepen the shine. When planning your budget, chips and remnants are often much cheaper than full sheets, especially if you hunt for clearance bins.
2. Color-Block Checkerboard in Smooth Ceramic
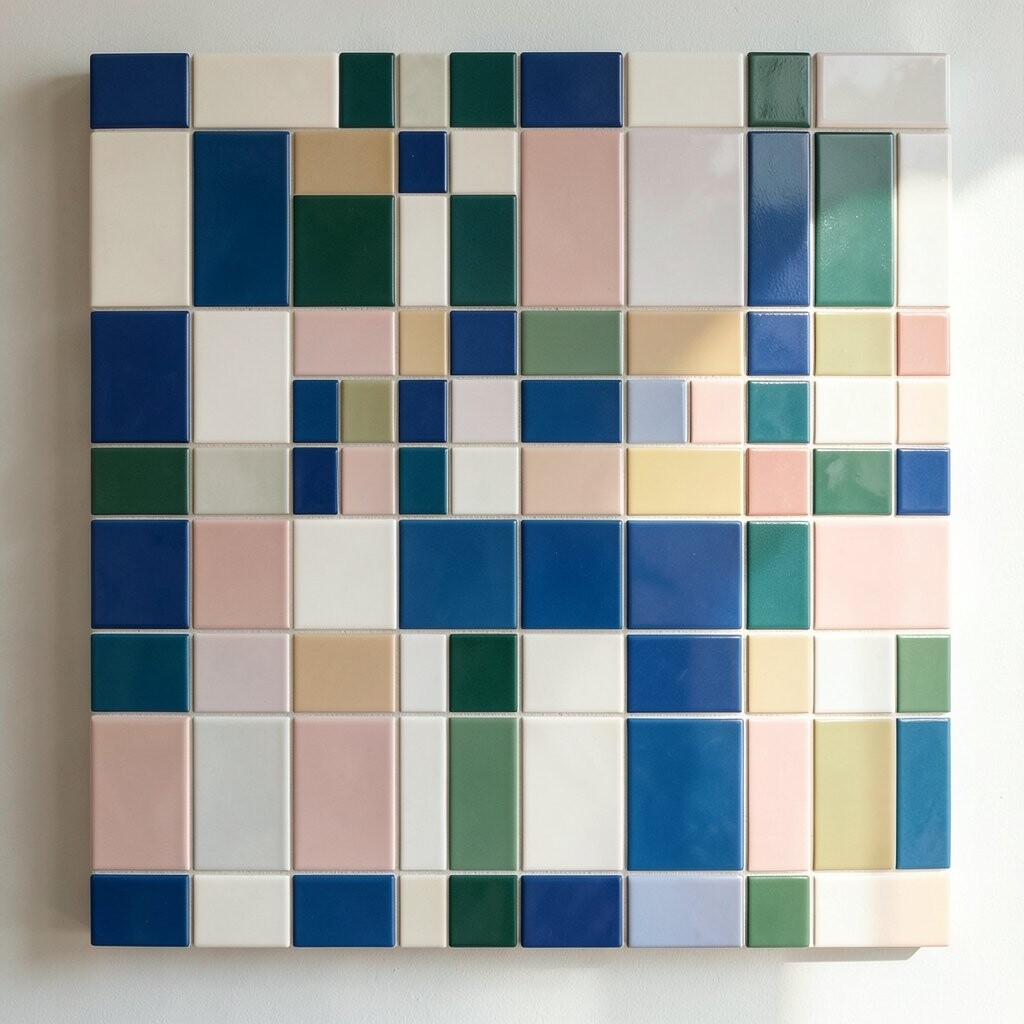
Checkerboard walls look bold in a friendly way. Choose small square ceramic tiles and build a simple grid that feels neat, graphic, and full of energy.
Pick two colors that work with your room, like cream and terracotta or navy and white. Measure your wall area, then dry-lay tiles on the floor to spot mistakes before you commit. Use spacers if you want crisp lines, and keep an eye on level marks near the ceiling and baseboard.
To make the project feel personal, add a thin “accent strip” near eye level using a third color. You can also vary the shade slightly by using multiple batches so the pattern looks richer. This is a great choice if you like practical results because it hides minor unevenness better than detailed artwork.
In terms of cost, ceramic sheets sold as offcut bundles can be easier on your wallet than individual pieces. If you’re working in a rental, consider creating the mosaic on a removable panel and mounting it with sturdy hooks. That way you get the impact without worrying about long-term wall changes.
3. Coastal Waves with Blue-Green Glass Peels
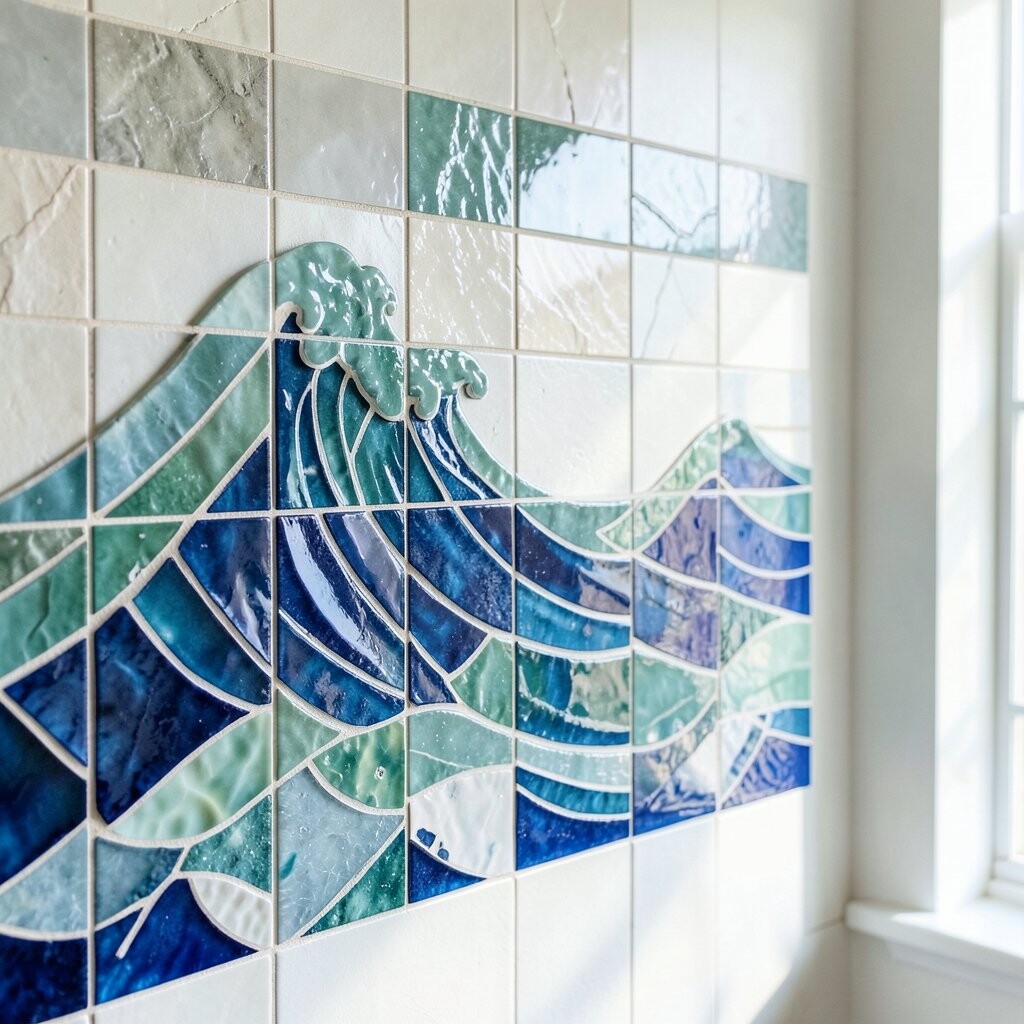
Picture a wall that looks like gentle waves rolling in. Using small glass tiles in blue and green tones creates a watery effect that feels calm and airy.
Arrange tiles in curved lines, letting darker pieces tuck into the “valleys” and lighter pieces form the “crests.” If you want the wave shape to stay consistent, draw a few big curves first and follow them like a guide. Seal glass tiles with the right grout plan so they keep their sparkle and don’t get dull over time.
For personalization, add tiny specks of seafoam glass to mimic foam. You can also include one vertical ribbon of slightly brighter tiles to guide the eye upward. This style fits current trends toward spa-like spaces and soft color palettes.
Because glass can be a little pricey, balance your budget by using glass only for the top third or for the wave highlights. The rest can be filled with ceramic that matches the color range. That approach keeps the look dreamy without making your cart feel scary at checkout.
4. Geometric Hexagon Wall with Scrap Tiles
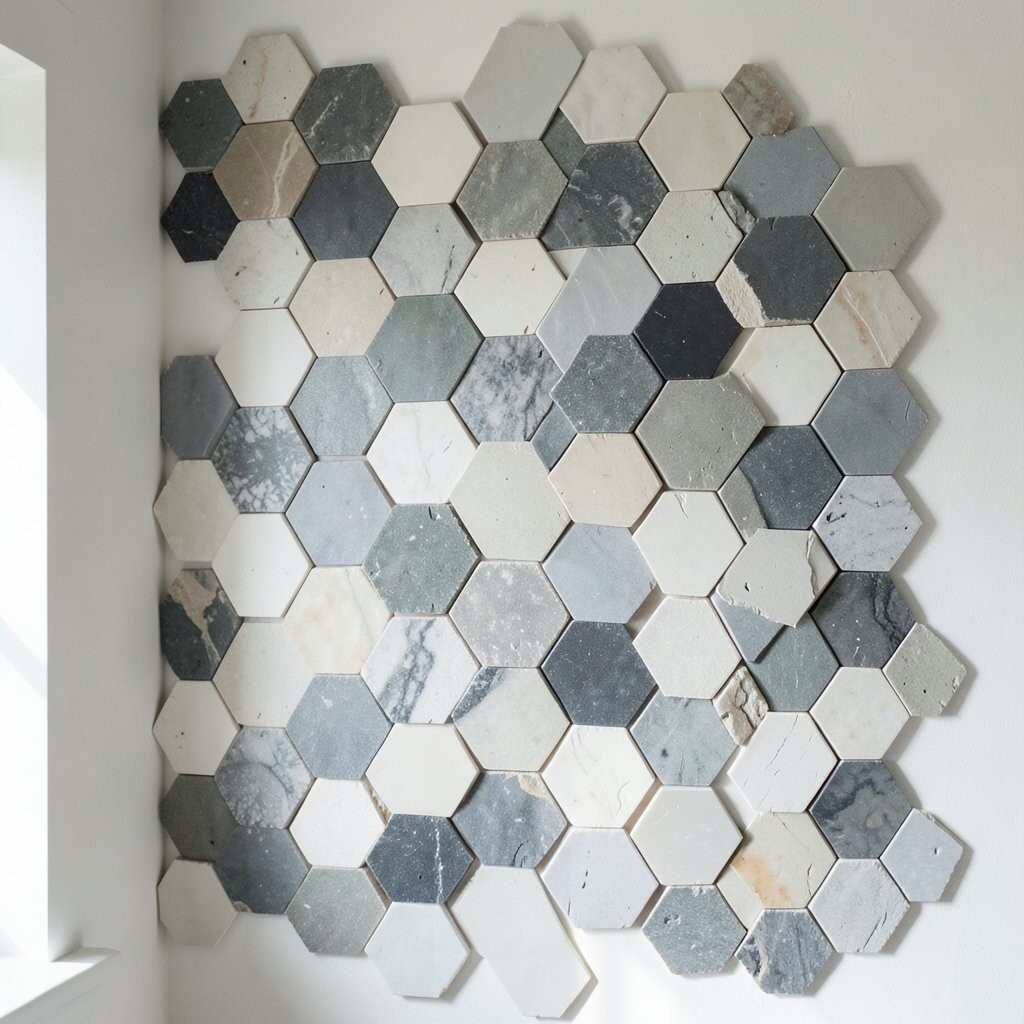
Hexagons make a wall feel modern and playful at the same time. When you mix scrap tiles in related colors, the pattern becomes a conversation piece.
Trace hexagon outlines on paper and tape them lightly to your wall so you can place each piece with confidence. Cut tiles carefully using a tile cutter, and remember that small gaps look best when grout lines are consistent. Keep the spacing the same across the whole wall so the honeycomb stays crisp.
To make it DIY-friendly, build in rows rather than trying to do everything at once. Use a backing board if you want to work flat, then mount it when done. If you like bold style, go for higher contrast colors like charcoal, mustard, and cream; if you prefer calm, use soft pastels and light grays.
Scrap mosaics are one of the best ways to manage cost because you’re reusing what you already have. Look for leftover tiles from friends, thrift stores, and renovation leftovers. You’ll also feel good knowing your wall is unique because no two scrap collections match.
5. Hand-Painted Look with Flower Petal Inlays
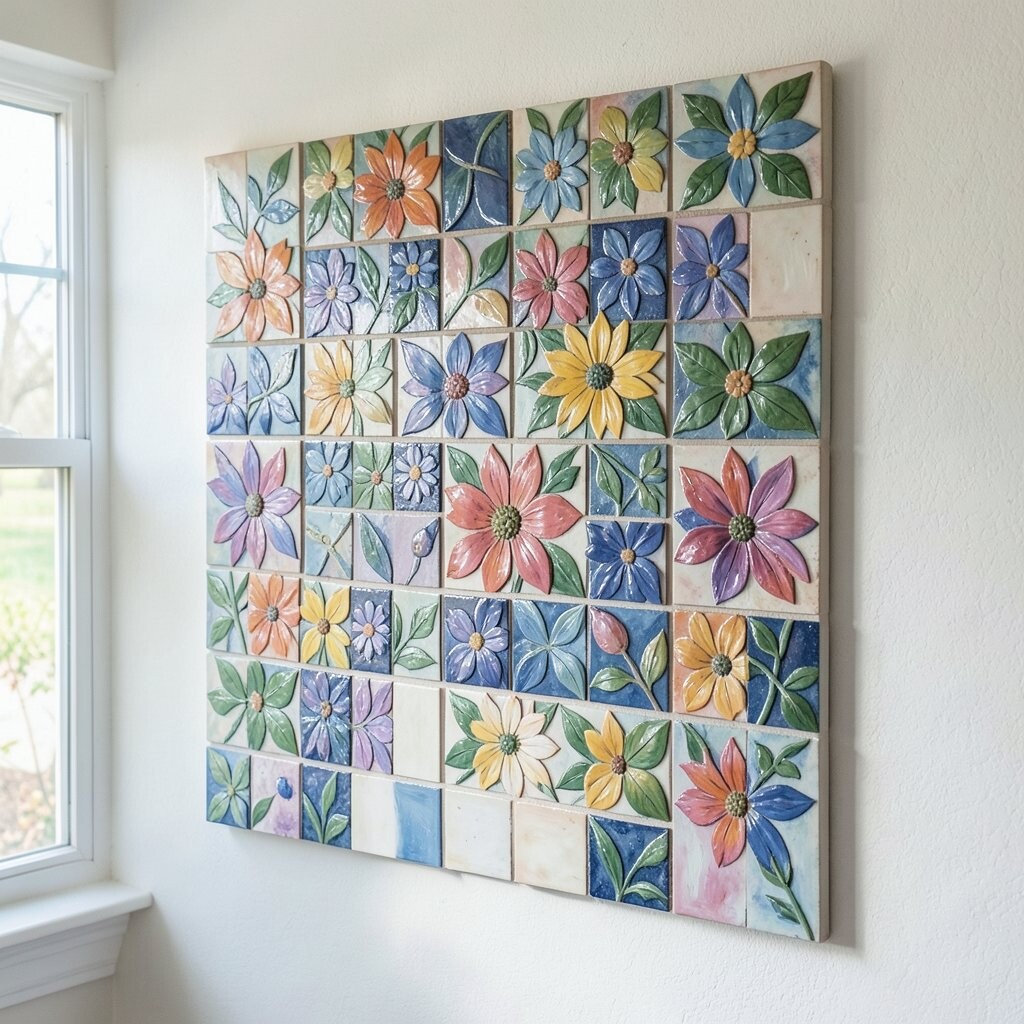
Flowers on a wall don’t have to be complicated. Make a petal mosaic using rounded tile shapes or small cut pieces that form soft curves.
Choose one main flower near a focal area, like above a console or behind a reading chair. Build the petals using a gradient, starting lighter at the outer edges and getting deeper near the center. For the center, use a mix of tiny gold-toned tiles or small dark chips to give it a lively sparkle.
If you want the “painted” feeling, keep your grout lines thin and use colors that blend smoothly. Try adding a few smaller flowers around the main one for balance, but don’t crowd the wall. This is a great option if you love personalization, because you can match the flower colors to your room decor.
Budget-wise, you can keep costs lower by using most tiles as simple background colors and reserving special colors for the flower details. Check online for mixed tile packs or mosaic tile kits, which often come with enough variety for a centerpiece without overspending.
6. Minimal Line Mosaic with Slim Tile Strips
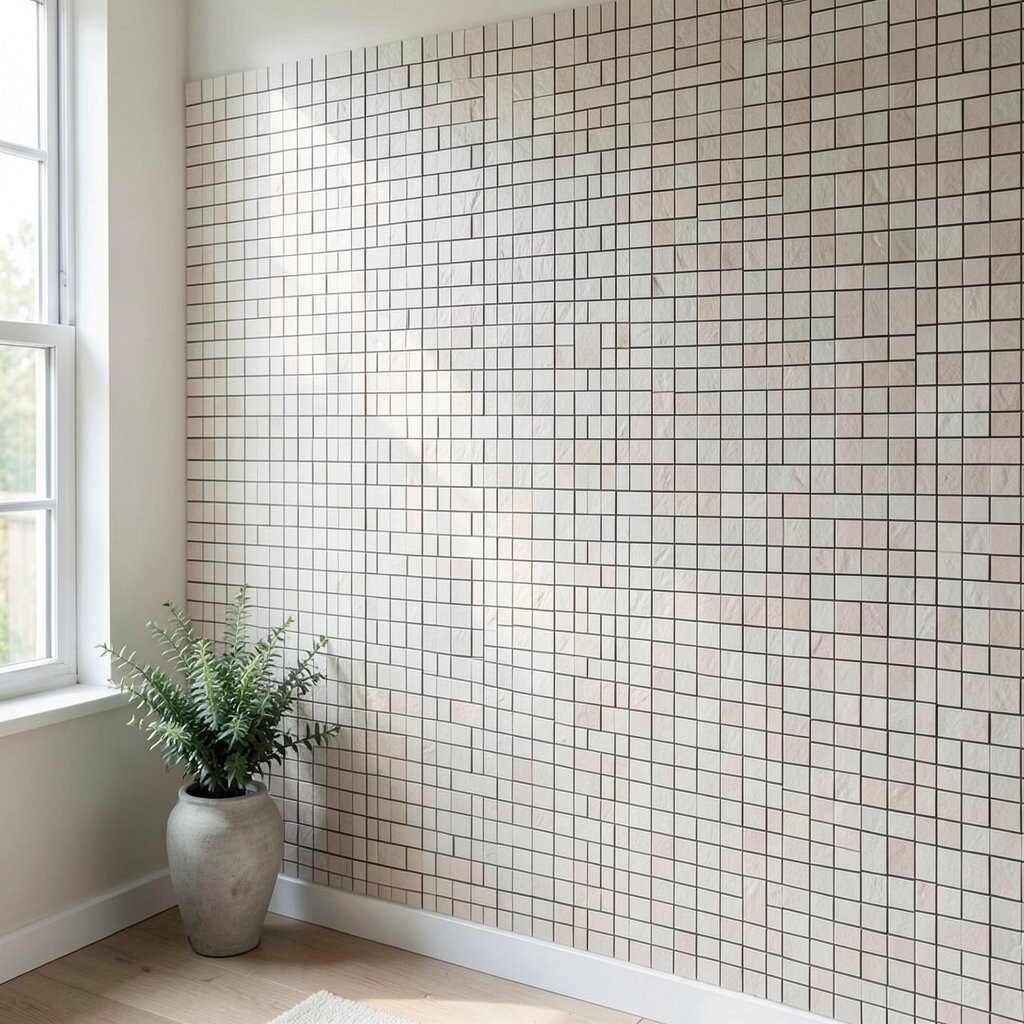
Sometimes the prettiest wall is the simplest one. Slim tile strips arranged in lines create a clean, modern look that still feels handmade.
Start with a neutral base like off-white or light gray tiles. Then add narrow lines that run horizontally, vertically, or in gentle diagonals across the surface. Keep the design consistent so it looks intentional, not random.
For a personal twist, change the spacing of one or two lines to create a subtle rhythm. You can also add a small “corner frame” using thicker pieces to make the wall feel like it has a border. This style fits current trends toward calm, airy interiors and simple textures.
For cost control, buy affordable tiles in larger sheets for the background and save the more expensive slim strips for the accent areas. If you’re new to mosaics, line designs are forgiving, because slight differences are less noticeable than in detailed patterns.
7. Marrakech-Inspired Fan Pattern in Warm Earth Tones
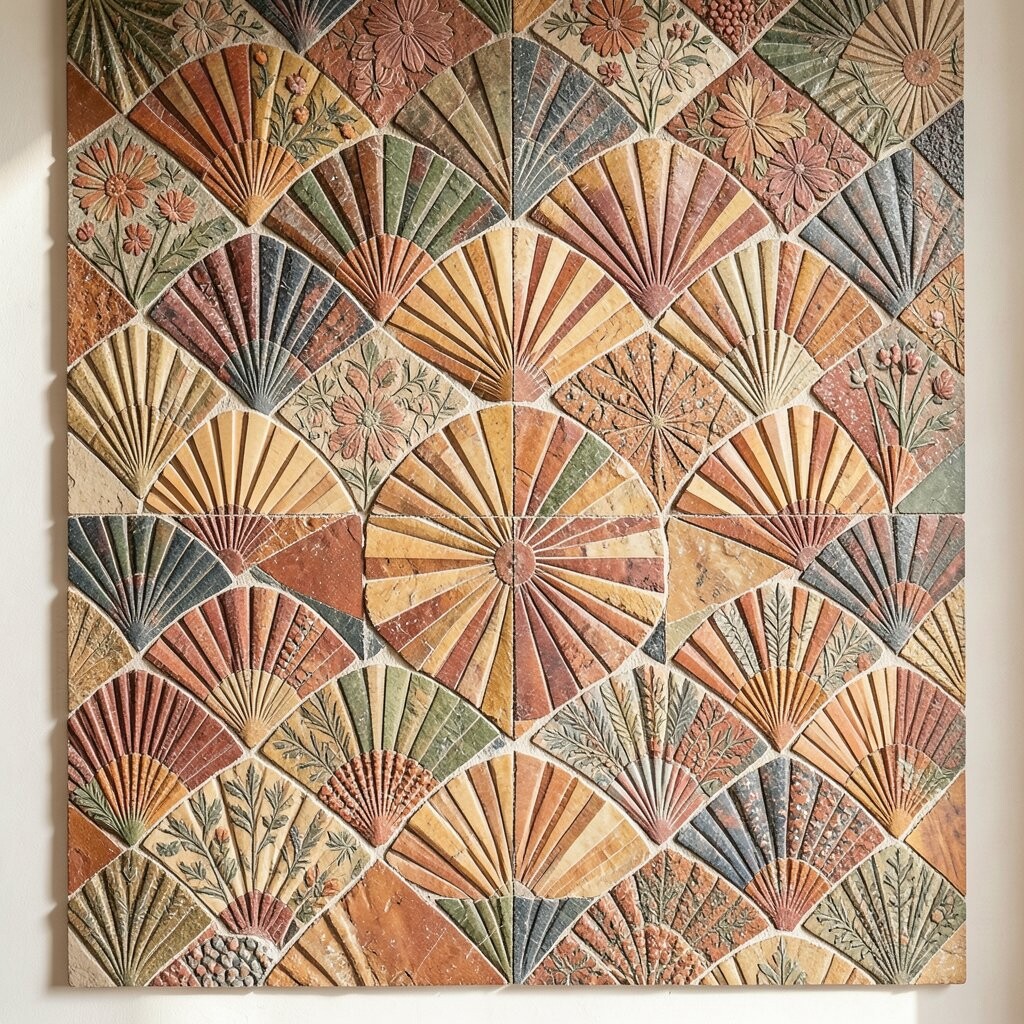
Bring the warmth of desert bazaars to your own home. A Marrakech-style fan mosaic uses repeating curves and rich colors that make a wall feel lively and welcoming.
Use terracotta, rust, tan, and a touch of deep green for a classic palette. Arrange fan shapes so each one points slightly the same direction, then add small dots or diamond accents to fill gaps. Draw a grid lightly first so the repeating pattern stays balanced.
To personalize, choose one star-like shape at the center of the wall and build the repeating fans around it. You can also adjust the intensity by using more neutral tiles so the pattern stays cozy instead of overwhelming. This is a great choice for hallways because it adds interest without requiring a lot of floor space.
For cost, consider using pre-cut mosaic sheets for the small pattern parts and using larger tiles for the bold fan curves. That mix often reduces cutting time and saves money while still looking high-end. Sealing grout after curing helps keep the colors crisp and easy to clean.
8. Retro Arcade Pop with Multicolor Diagonal Tiles
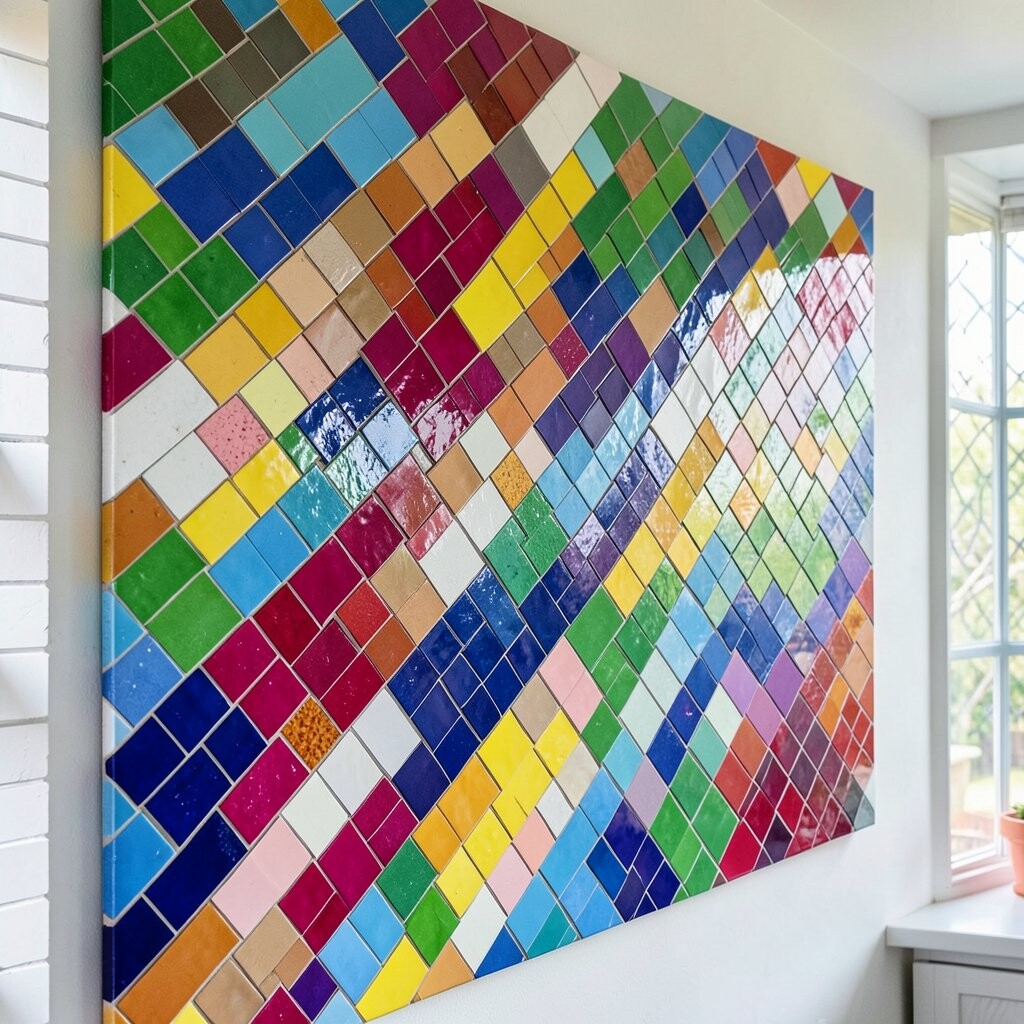
Want a wall that feels fun the moment someone walks in? A retro arcade mosaic uses bright colors and diagonal energy to bring excitement to your space.
Choose a base color like white or pale gray, then place diagonal rows of small tiles in bright shades. Think about using colors that already appear in your room, like teal pillows, orange art, or yellow lamp shades. Keep each row straight by using a level line as your guide at the top and bottom.
For uniqueness, add a few “glitch” sections where colors overlap slightly, but don’t overdo it. You can also create a small heart, lightning bolt, or star using the brightest tiles so the wall has a friendly focal point. This style is trending because it taps into playful maximalism while still reading clearly from across the room.
Cost considerations are easier with this design because you can build it mostly from budget-friendly ceramic tile. Save your pricier glass tiles for the most eye-catching highlights. If you’re working on a tight budget, thrifted colorful tile fragments are a sneaky way to get variety without paying for brand-new pieces.
9. Marble-and-Wood Frame Look with Border Tiles
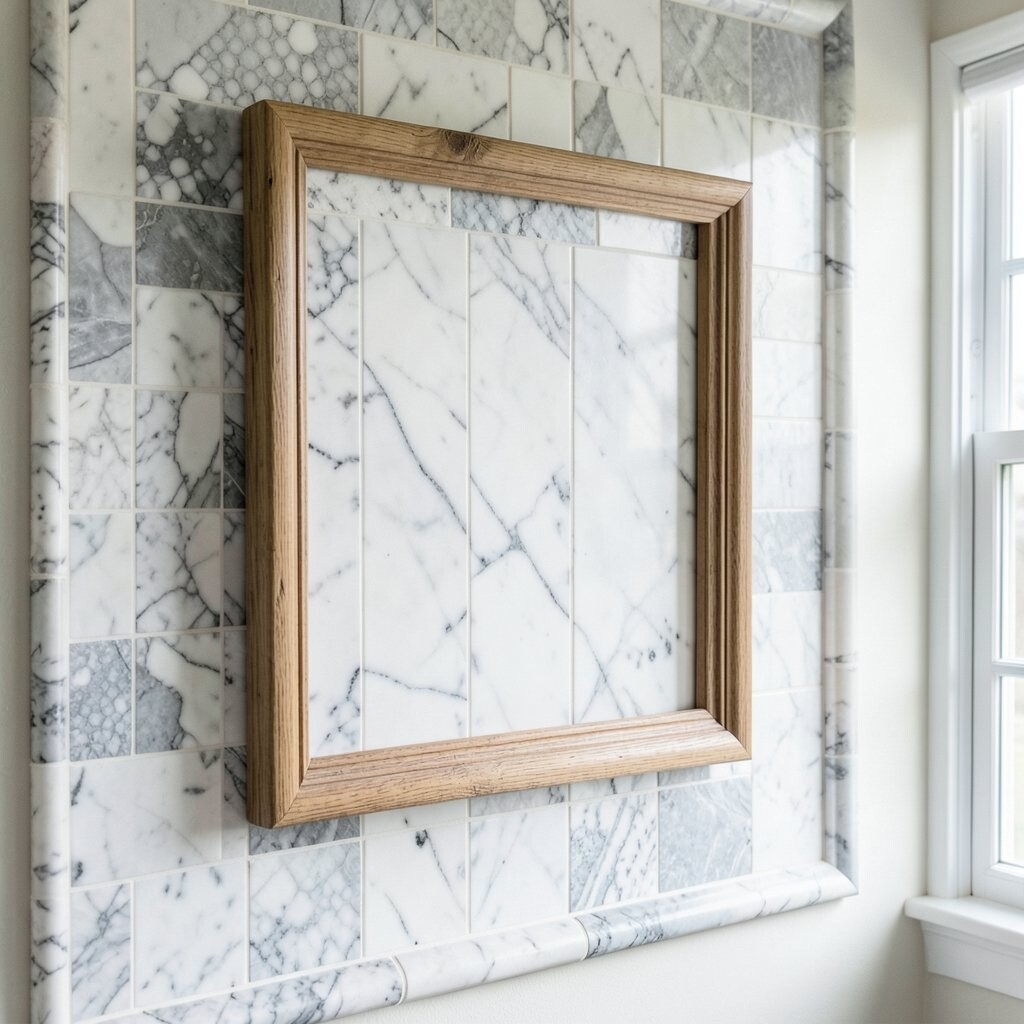
A border mosaic can make your wall feel styled even when you keep the center simple. Using tile strips to create a frame gives the look of an elegant panel without the full floor-to-ceiling effort.
Pick one background area, then create a thin or medium border using small tiles in a subtle pattern. For a “marble and wood” vibe, use warm beige and soft gray tiles and pair them with grout that matches the light tones. If you like contrast, choose a darker grout line to make the frame pop.
To add personalization, place one small corner detail in a different color, like muted gold or charcoal. That little twist makes the border feel custom and not like a store-bought standard. If the wall is in a dining area, the frame design helps the space feel more polished and intentional.
For practical tips, work out the border measurements carefully before you glue anything. Buying border tile sheets can be more expensive than mixing your own, but it saves time and makes spacing easy. If you’re watching costs, blend purchased sheets with leftover tiles where you can.
10. Tropical Leaves with Dark Green Outline Tiles
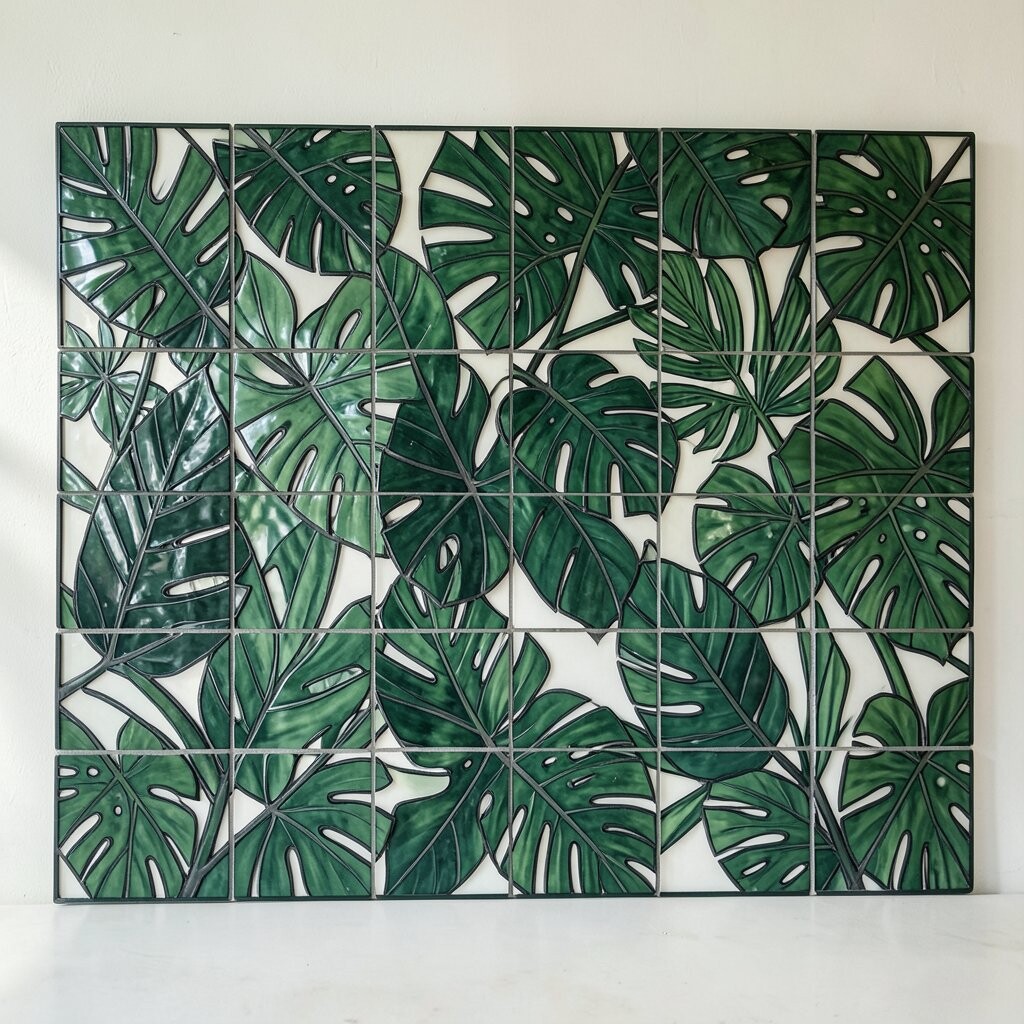
Leaf patterns bring instant vacation vibes. A tropical mosaic with dark green outlines and lighter leaf fills looks bold, fresh, and full of life.
Choose a simple leaf silhouette first, then repeat it across the wall like a pattern print. Use dark tiles to outline each leaf and lighter tiles to fill the interior for a clean, graphic look. Keep grout consistent so the lines stay crisp and readable.
For personalization, add a few accent leaves in gold or bright lime so the wall feels playful. You can also place a larger centerpiece leaf behind a mirror or light fixture so it glows in the room. This idea is popular right now because it mixes nature-inspired decor with modern crispness.
To manage cost, use mostly affordable ceramic tiles and reserve glass only for the accents. Using fewer colors also keeps the project from becoming complicated and reduces the need for lots of different materials. If you’re mounting the mosaic in a kitchen or bathroom area, select grout and sealant that match the moisture level to keep everything looking new.
11. Morning Calm with Pastel Ombre Tile Panels
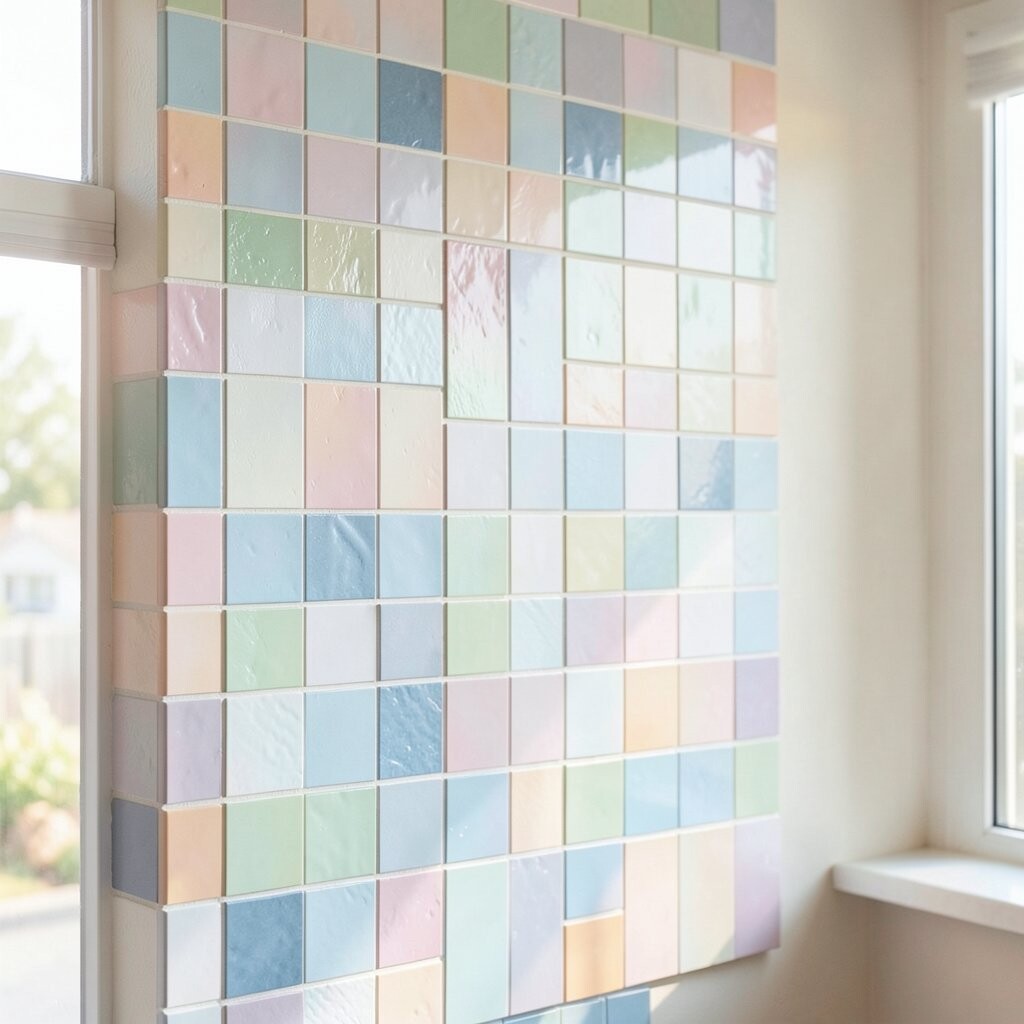
Ombre effects make a wall feel soft and soothing. Pastel tile mosaics fade from light to deeper shades, like sunrise colors spreading across the wall.
Pick one pastel family, such as blush, peach, and pale coral, or mint, aqua, and seafoam. Arrange tiles so each row gets gradually darker or richer as it moves across the wall. Dry-lay the sequence first so the fade looks smooth, not patchy.
For personalization, add a subtle texture by mixing tile finishes like matte with a little glossy shine. You can also include a thin stripe where the ombre changes direction, creating a gentle focal band. This style looks modern and airy, which works great in bedrooms, nurseries, and reading nooks.
Cost considerations are manageable because pastel tiles are often available in larger quantities as matching sets. If you can’t find an ombre bundle, buy tiles in three or four shades and build the fade yourself. It’s a clever way to control the exact look while staying budget-aware.
12. Art Deco Fan Tiles with Black and Gold Highlights
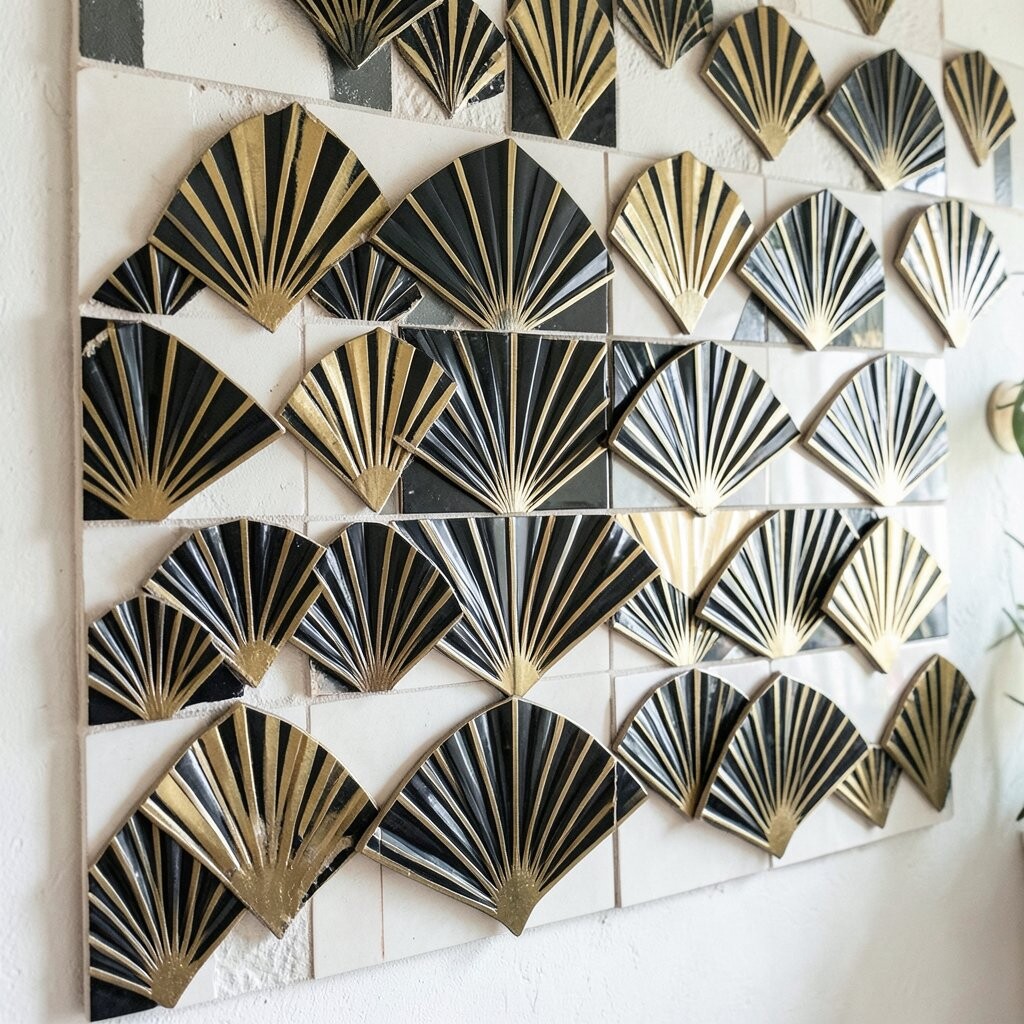
Art Deco mosaics feel fancy, bold, and dramatic. A fan pattern with black tiles and gold-toned highlights brings a glamorous glow that still feels DIY-able.
Use black tiles for the main shape and add gold or brass-toned pieces at the tips and corners. Sketch the repeating fan design, then place the outlines first so the structure guides the rest of the mosaic. Keep your line work neat, because Deco patterns look best when they feel sharp and balanced.
To personalize, choose a slightly warmer gold so it matches your room lighting. You can also add one central panel with a larger fan to create a “statement wall” without covering every inch. This style has been showing up more lately because people want vintage charm with a sleek, modern edge.
For cost, black tiles often come in affordable ceramic options, and gold accents can be limited to small areas. That means you can get the luxurious look without paying for gold everywhere. Make sure you use a grout color that complements black rather than fighting it, since contrast is what makes Deco lines pop.
13. Patchwork Memory Wall with Meaningful Tile Remnants
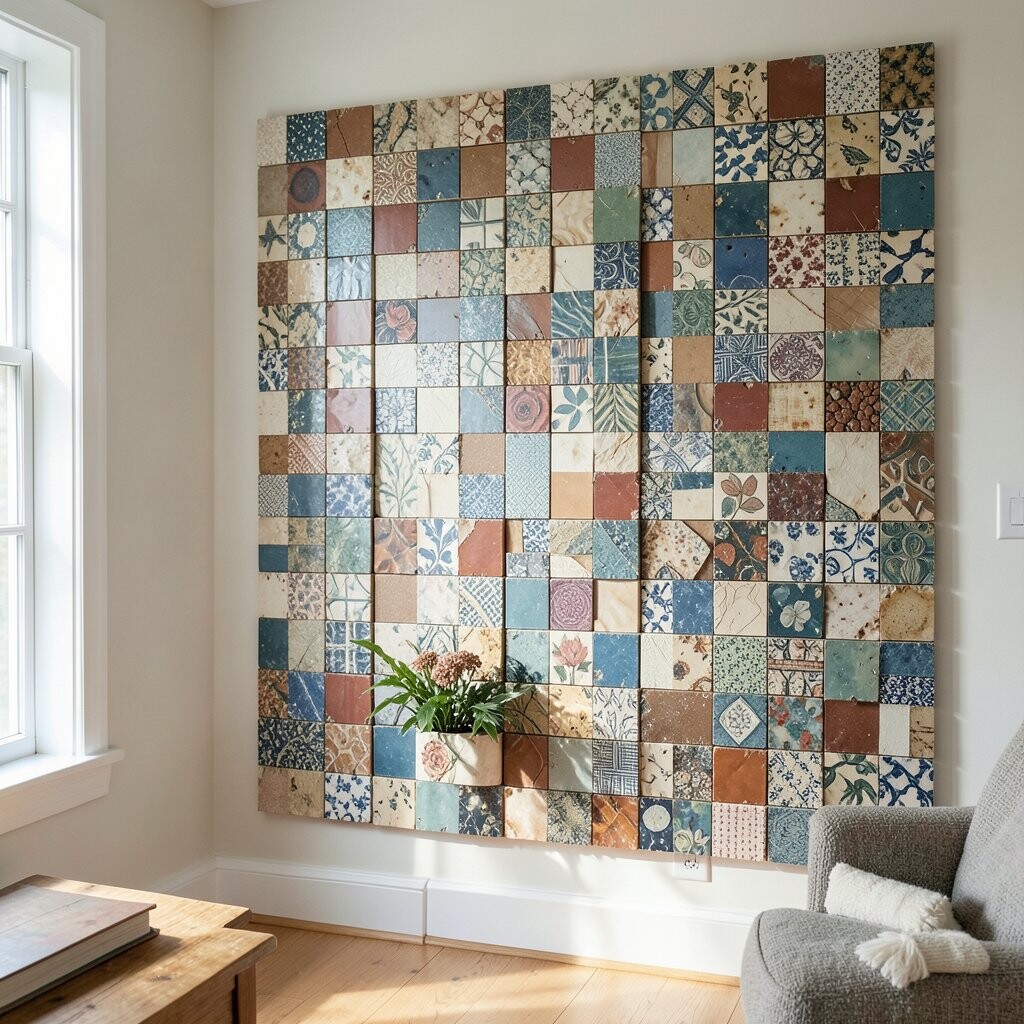
This one turns your wall into a story. Patchwork mosaics use different tile shapes and colors, but the best part is that each piece can carry a memory.
Collect small remnants from previous projects, gifts, or thrift finds, then sort them by color and texture. Mix glossy and matte tiles so the wall has depth, and place pieces with similar tones next to each other for smoother transitions. If you want it to look intentional, limit the palette to a few families like warm neutrals, blues, and greens.
For practical tips, create a rough layout on the floor before gluing anything. Keep a close eye on how the wall will be viewed from the doorway or main seating area so the design doesn’t feel random. Add a few standout pieces, like a patterned tile or a special color, to create mini “chapters” across the wall.
In terms of cost, this is often the most budget-friendly because you’re reusing what you already have. It’s also uniquely yours because no one else will have the same remnants. Sealing and using the right grout helps the wall stay durable, especially in high-touch areas like entryways.