
The right wall art can make a room feel instantly warmer. Dried flowers add softness, color, and a calm kind of charm that lasts.
1. Pressed-Flower Lattice in a Gridded Frame

Start with a gridded frame and fill each square with pressed blossoms at different heights. The wall will look tidy, airy, and full of little pops of color.
Choose flowers with thin stems and flat petals, like daisies, statice, or small wildflowers. Arrange them like a gentle pattern rather than a single cluster, so the eye moves across the whole grid.
To keep the look neat, trim stems close and press blooms until they feel crisp. If you want personalization, mix your favorite wedding colors or match the palette of your curtains. This style also tends to be budget-friendly because pressed flowers can come from inexpensive packs or even home harvests with careful pressing.
2. Vintage Postcard and Flower Mix-Up Gallery

Pair dried flowers with vintage-style paper, like old postcards or scrapbook pages. When the petals sit over printed scenes, the wall feels storybook and more layered than plain art.
Use a consistent size for each “card” so everything looks organized, even when the flowers vary. Pick postcards that match your room theme, such as coastal stamps for a breezy space or botanical sketches for a calm corner.
For practicality, protect the paper with a clear matte cover, since paper can yellow over time. This idea is unique because the flowers look like they’re part of a memory, not just a decoration. If you want a current look, lean into warm neutrals and earthy inks, then let the dried petals bring modern soft color.
3. Shadow-Box Depth With Botanical Layers

Shadow boxes make dried flowers feel like they’re floating in a tiny garden. The depth adds drama, so even a small cluster looks impressive from across the room.
Layer petals and leaves at different distances inside the box, using small scraps of tissue paper or archival paper to separate them. The visual effect is rich and dimensional, and it also helps keep delicate blooms from touching.
For benefits, shadow boxes protect flowers from dust and reduce handling, which helps them stay pretty longer. Personalize by adding a pressed sprig that matches a meaningful date, like a favorite month’s bloom. Cost is often moderate because you can buy a few quality boxes and reuse them as your collection grows.
Try mixing textures, such as lace-like foliage next to thicker flowers, so the arrangement feels balanced. Many people also use muted tones with one bold accent flower for a stylish, trendy look.
4. Minimalist One-Flower Frames for Clean Walls
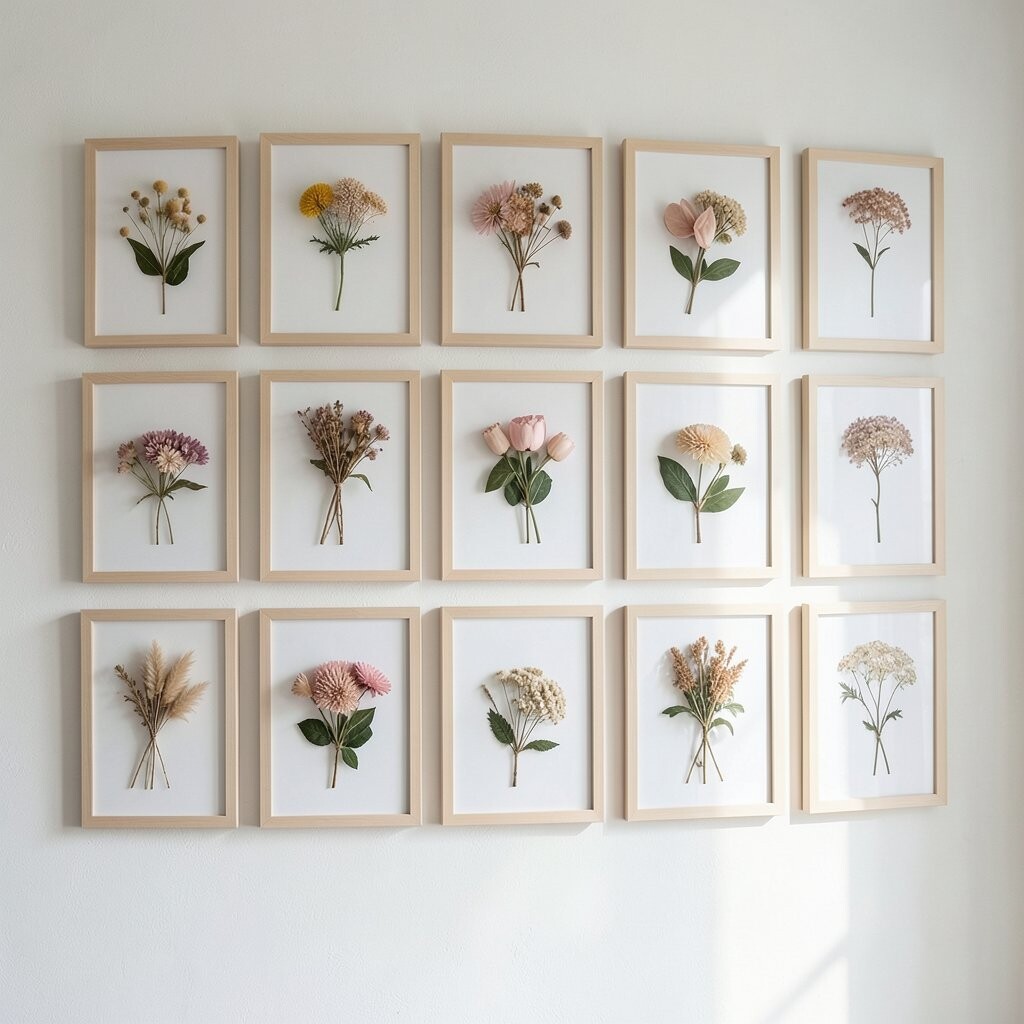
Go for a simple frame with one carefully chosen dried bloom near the center. This style looks modern, calm, and surprisingly eye-catching even with lots of empty space.
Choose a single focal flower like a dried rosebud, a sunflower head, or a cluster of lavender. The benefit is that the display stays easy to maintain, and you can quickly swap new flowers as your tastes change.
For practicality, keep the bloom flat and secure with archival mounting tape or thin glue dots. If you want personalization, match each frame’s background to your paint color, like warm cream for a cozy look or cool gray for a clean vibe.
5. Color-Blocked Wallpaper Backdrop With Dried Blooms

Try a small section of your wall covered with color-blocked paper, then mount dried flowers on top. The bold background makes petals pop and turns your gallery into a designed feature wall.
Use two or three coordinating colors, such as dusty rose and sage, so the display feels cohesive. Arrange flowers in groups that match each color block, which gives your eyes an easy path to follow.
If you’re thinking about trends, this approach fits the popular “accent wall” style people love right now. Keep costs in check by using affordable removable wallpaper or craft paper, then invest in a few nicer frames where people will look most.
Personalize by reflecting your hobbies, like adding tiny dried sprigs that match your favorite tea blends for a calm, nature mood. To keep everything secure, use picture hooks that hold weight well, especially if your backing is thicker.
6. Circular Garland-Style Wall Arrangement

Make a circular layout by arranging dried stems in a wreath-like shape, then hang it flat on the wall. Even without a big ring, the circular motion gives your space a gentle, welcoming feeling.
Use a mix of blossoms that keep their shape, like strawflowers and baby’s breath, and tuck them in with wire or thin twine behind a backing board. The visual description is soft and flowing, with petals that look like they’re drifting in a slow swirl.
This setup is unique because it acts like wall decor and art at the same time, especially in entryways or above a console table. For practical tips, mist lightly with a bit of hair spray only if needed for flyaway petals, and keep the piece away from direct sunlight.
7. Book-Page Background With Dried Flower Silhouettes

Use printed book pages or neutral text paper behind your dried flowers for a vintage, thoughtful look. The text adds texture, while the blooms bring warmth and color.
Create a silhouette effect by placing flowers in a way that highlights their shape rather than stuffing the frame with extra petals. This keeps the composition clean and makes the wall art feel intentional.
Personalization is easy because you can choose pages that match your story, like poetry, old letters, or a favorite novel’s theme. The benefit is also practical since book pages are usually cheap and easy to source from thrift stores. If you want a more modern twist, use fewer flowers and stick to one or two shades so the typography stays the star.
Just be gentle when mounting, because paper can tear if you press too hard.
8. Gallery Wall With Matching Frames and Mixed Bloom Sizes

A classic gallery wall works beautifully with dried flowers when you keep the frame style consistent. Choose matching frames and then vary the bloom sizes so the wall looks lively rather than flat.
Mix large statement pieces, like dried hydrangea heads, with smaller sprigs that fill the gaps. The visual description feels balanced, like a curated botanical collection.
For benefits, matching frames make the display look polished, even when your flowers differ. Personalize by using a color theme, such as blush and tan for a calm room or deep plum and gold for a cozy vibe.
Cost considerations are manageable because you can start with a few frames and add more over time. Many current trends also lean toward “collected over time” art, which means your gallery can keep growing as you find new blooms.
9. Transparent-Glass Panel With Pressed Botanicals

Mount dried flowers behind a clear glass panel for a floating, clean look. The transparency helps the room feel brighter, because the art doesn’t block light the way thicker boards can.
Use pressed botanicals that lay flat, then arrange them like scattered confetti or a gentle diagonal. The visual effect is delicate, and it looks great in hallways where you want something subtle but special.
For practicality, choose UV-protective glass if you can, since sun can fade petals. This style is unique because it feels airy and modern, like nature pressed into a modern display.
If you want personalization, use a light grid pattern under the glass to guide placement, or place a photo behind the panel for an extra layer of meaning. Costs can run higher due to glass, but you can keep expenses down with smaller panels first.
10. Monogram or Initial Art With Dried Flowers Inside

Make your wall feel personal by shaping dried flowers into a monogram or initial. When the letter is filled with petals, the whole piece feels intentional and warm.
Cut a bold letter from sturdy cardboard or thin wood, then glue dried blooms into the shape. Choose flowers that vary in color and texture so the letter has depth, like mixing soft creams with deeper greens.
Benefits include instant personalization, since it can match your family name, your favorite word, or a meaningful date. Keep the piece practical by sealing it with a clear, matte craft sealer to reduce shedding.
For current trends, people are loving “personal symbol” decor, and a monogram fits right into that look. Cost is often reasonable if you buy simple letter cutouts and use dried flowers you already have or purchase in small bundles.
11. Fabric-Collage Backing With Soft Dried Flower Texture

Instead of paper, use fabric as the backdrop so dried flowers look softer and more cozy. A linen-like cloth or neutral cotton creates a gentle background that matches many home styles.
Arrange flowers on a stretched fabric canvas, or mount fabric inside a frame for a clean edge. The visual description becomes tactile, with petals and leaves giving a gentle contrast against the fabric weave.
This idea is unique because it feels warmer than rigid paper displays, making it perfect for living rooms and bedrooms. For practical tips, choose a fabric in a light color so dark stems don’t overpower the composition.
Personalize by picking a fabric that matches your bedding or favorite throw blanket pattern. Costs can be kept low by using thrifted linens, and you can reuse the same canvas shape for new seasonal flowers.
12. Seasonal Color Series With Rotating Flower Sets

Create a dried flower wall gallery that changes with the seasons by using interchangeable inserts. You’ll get the benefit of variety without needing a whole new setup every time.
For example, one section can hold spring pastels, another summer golds, and another cozy autumn tones. The visual description becomes a living calendar that makes your home feel refreshed and cared for.
This approach is unique because it turns decor into a routine that feels exciting rather than repetitive. Personalize by using colors that match holidays you love, like winter evergreens or spring garden herbs.
To keep things practical, mount your base frames once, then slide in new backing boards with flowers sealed on top. Cost considerations are easier here too, since you’re investing in the framework and upgrading the flower sets gradually, which fits how people build up decor over time.